However, last year I stumbled across a really great idea for a portable (you can put it in your under-seat tool tray) “Pocket Wheel Balancer” in an article written by Brian Curry on the IBMWR website. In brief, his balancer does away with the heavy, bulky balancing stand by mounting the balancing rollers on two little metal plates which are then hung from any convenient over-head support. The wheel and axle are placed on the suspended balancing rollers and balancing then proceeds as with a normal stand balancer.
Brian deserves the credit for this very excellent idea.
My contribution to his original concept is to use readily-available materials — primarily ABEC3 skateboard bearings — and standard hand-tools for construction. A couple of hours worth of time in the work shop gets you a tiny, go-anywhere, use-anywhere, extremely sensitive (it will react to the weight of a 1/4-20 nut placed on the spoke of a snowflake wheel), static wheel balancer that only costs about $10.
Materials List
- 4 ABEC3 skateboard bearings
- 4 machine bolts, 8mm X 20mm (or 5/16″ X 3/4″), with nylock nuts and washers
- 2 machine screws, 4mm X 20mm (or 1/8″ X 3/4″) with a standard and nylock nut for each screw
- 8 inches of 2″ wide by 1/8″ thick aluminum bar stock
- 20 feet of nylon twine
Suggested Tools
- hacksaw
- electric drill with 4mm (or 1/8″), 8mm (or 5/16″) drill bits and 1-1/4″ hole saw
- small steel square/rule
- vernier/dial calipers (if you don’t have one, as an AirHead, you really ought to add one to your tool collection — you’ll find yourself using it all the time)
- small file (or fine sandpaper, emery paper, etc.)
- sharp scribe and center-punch — or just use a good-sized common nail
Building the Balancer
If you don’t have some laying around your garage, go to the local hardware store and get a short piece of the aluminum bar stock that is 2″ wide, about an 1/8″ thick and comes in standard lengths like 3′ or 4′ (you know the place in the store – usually has various sizes of aluminum and mild steel angle, straight, and channel stock in various sizes standing upright in slots at the end of an aisle). I got the three-foot length – it is enough to make 5 sets of balancers.
The center hole on skate board bearings is 8mm (or 5/16″). Get four 8mm (or 5/16″) bolts just long enough to go through the thickness of the plate, a bearing, an 8mm (or 5/16″) flat washer and a 8mm (or 5/16″) nylock nut (I used 8mmX20mm bolts, but 5/16″X3/4″ should work fine — 4 bolts, washers, and nuts total).
You will also need two small bolts (I used 4mmX20mm but 1/8″X 3/4″ is fine) with a nut and nylock nut apiece and about twenty feet of sturdy nylon string or twine.
Cut two 3-1/2″ – 4″ lengths from your aluminum stock with a hacksaw. Scribe a center line all the way down the length of each (this is important!). I used my vernier caliper to establish the exact center line down the plate, then scribed the line using a steel rule and a good-sized common nail as the scribe.
Drill a 1-1/4″ inch hole in the center of each plate with a hole saw (at least that’s what I used; the aluminum is soft, so an old hole saw I had for wood boring worked fine — the trick is to stop every few seconds and clean the aluminum out of the saw’s teeth). Once you’ve got the holes bored, clean up and smooth the edges with a small file, sandpaper, emery paper, whatever.
Now you need to mount your skateboard bearings. You want them side-by-side, perpendicular to the centerline with the tops of the bearings sticking up into the 1-1/4″ hole far enough that your axle will rest on them and not the aluminum (in effect, you are making a rolling V-groove). Since skateboard bearings are 22mm in diameter, I found that putting the bearing centerline 6mm (.225″) below the bottom edge of the 1-1/4″ hole is about right (you can go a bit less, but not much).
Again, I used my vernier caliper to measure down the 6mm, then used a steel square and my sharp nail to scribe a perpendicular line across the plate, 6mm below the hole. Since the bearing is 22mm in diameter, just measure 11mm out from each side of the scribed ‘vertical’ centerline on the newly-scribed ‘horizontal’ line, center-punch the spots very carefully with your sharp nail and drill your 8mm (or 5/16″) holes. Go to the other (‘top’ )side of the plate and drill a 4mm (or 1/8″) hole for your hanger bolt right on the vertical center line about half-way between the 1-1/4″ hole and the top of the plate. Do the same for the other plate. Clean up and smooth any rough edges with your file or sandpaper, etc.
You now have 2 aluminum plates with 4 holes drilled in each of them and are ready for final assembly. Put two 8mm bolts through a plate, then two 8mm washers (these shim the bearings away from the plate, so try to make sure the washers are the same thickness), then two bearings, side-by-side, then snug everything in place using the 8mm nylock nuts. Turn the bearings and make sure they spin freely and do not rub – particularly on each other. Because of the way I laid out the holes, there is a good chance the bearings will just barely rub each other. To fix this, disassemble the unit and LIGHTLY file the 8mm holes a pinch to allow the bolts to move away from each other JUST enough that the bearings do not rub. Once you have the bearings spaced properly and spinning freely, tighten them down firmly.
Now run a 4mm standard nut down a 4mm bolt and insert the bolt in the 4mm hole at the top of the plate, with the bolt head and nut on the bearing side of the plate. Thread your nylock 4mm nut onto the end of the bolt until the threads are flush with the end, then snug the standard nut down to the plate. Tie about 8 -10 feet of the nylon string to the 4mm bolt between the bolt head and standard nut. This puts the string directly over the bearings and allows the balancer plate to hang straight with the weight of the wheel and axle. Repeat the process with the other plate and you are ready to use the balancer.
Using the Balancer
In use, you hang the two plates from any convenient overhead support. Brian’s suggestion of four nails in the rafters is ideal and allows easy adjustment of the string length, but I’ve hung mine from the handlebars of my mountain bike which is hanging from the ceiling of my garage, I’ve used overhanging tree branches, a step-ladder as in the accompanying photo, you-name-it.
The trick is to space the plates about 8 inches apart and allow for easy up-and-down adjustment of the string length. I usually give the string a couple of wraps around the main support, then place the wheel\axle into the plates, then adjust the string length until the wheel is centered between the strings and hanging straight. At that point, just wrap the free ends of the strings around the support to hold everything in place and you are ready to balance the wheel. I use the stick-on weights that you can buy at NAPA – they come in the form of a lead bar with regular marks – you cut off the weight you need with a diagonal cutting pliers.
As with any static balancer, you give the wheel a gentle spin and wait for it to stop. Don’t spin fast – this unit has so little resistance that it will take FOREVER for the wheel to stop if you over-do it. When the wheel stops, mark the lowest point with chalk or a bit of tape and spin the wheel again. If the wheel stops at the same point again, you have found the heavy spot. From there, you simply add weight to counter-balance the heavy spot on the wheel. You have the balance right if the wheel won’t move on its own when the weight(s) and the heavy spot are lined up perpendicular to the strings, and the wheel stops randomly when spun.
There are a couple of ways to use weight to balance the wheel.
The most obvious and best approach is to add weight to the exact opposite side of the wheel from the heavy spot until the wheel balances. The only trouble with this method is that you have to get the balance weight EXACTLY right — which means a lot of fussing and trimming of weight until you reach the balance point, but it works the best. Mark the light spot on the rim, start with a little more weight than you need, then trim it down until you get it right — just don’t trim the weight TOO far or you’ll need to start over or add a tiny extra weight. If you cannot place the weight in the center of the rim due to spoke placement, cast-in ridges, or whatever, cut the weight in two and put the equally-sized pieces on either side of the rim to insure that the weight and rim is balanced equally side-to-side.
Another way is to use TWO equal-sized weights that are a BIT heavier than needed. Mark the light spot on the rim, and line the two weights up on either side of that mark. Now, move each weight away from the marked light spot a little, moving each weight the same distance so that the light spot remains in the middle. Moving the two weights apart has the same effect as trimming a single weight. Simply move the weights apart until the balance is right. The practical advantages of this method is that if you go too far, you just need to move the weights back toward each other to correct. It also allows balancing without altering your weights, if you are using clip-on weights that are only available in a limited selection. The drawback is that the slight extra weight does introduce a couple of tiny extra vector forces into the system, but the trade-off will generally be tolerable as long as the weights are no more that a bit more than needed to achieve balance as in the preferred method above.
Since I use the NAPA stick-on weights, I use tape (Scotch tape, packing tape, duct tape, masking tape, whatever) to secure the weight(s) to the rim until I get the balance right. Once the wheel balances, I mark the location of the weight(s), remove the temporary tape, clean the area on the rim with brake cleaner, peel the protective backing off the adhesive and stick the weight in place.
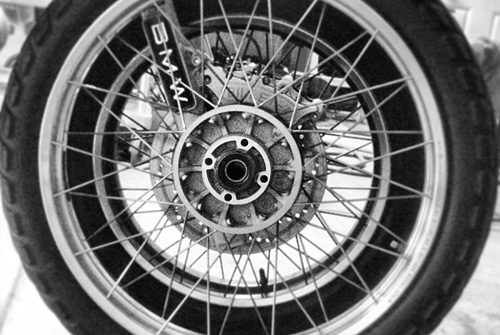
I shot a few pictures of the completed balancer so you can get a better idea of how simple it really is to build and use — it is a true AirHead’s tool!
Important Note
For those who have tapered wheel bearings, the Book’ (aka the gospel according to the AirHead’s own tech guru Oak Okleshen) says you should use 1″ diameter, properly-machined, custom spacers to slide onto your axles and then use the axle nut and washer to snug down the wheel’s tapered roller bearings in alignment square to the axles. This is because tapered bearings need to be squeezed together’ in order to hold their proper position and alignment. Robert Fleischer (Snowbum) describes spacers like these and their use in adjusting wheel bearing tension on the Airheads.org website in his excellent tech article on tapered wheel bearings, although his suggested 1-1/2″ diameter spacers would be too wide for this balancer; to do double-duty with this balancer, the custom spacers should be 1 inch in diameter.
I am in the process of having a set of these custom spacers machined up, but for wheel balancing purposes, you can get by without building a custom set by utilizing the front wheel bushing (the aluminum bushing on the left side of the wheel) and a couple of lengths of 3/4″ i.d. PVC pipe cut to length as spacers. You use the front wheel bushing as the machined spacer that rolls on the balancer, so make sure the bushing is clean and smooth without any nicks (I polished mine with a green 3M pad). All you need to do is cut two pieces of PVC pipe (I use a tubing cutter to make sure the cut is square) to equal the axle length normally taken up by the left fork slider for the front axle and the rear drive unit for the rear axle. Just make sure the axle nut and washer can snug the bearings down securely (it doesn’t need to be much more than finger tight) and you are ready to balance. I suppose if you wanted to get an extra front wheel bushing, that would make things even handier (for my 1984 R100RS, its part number is 36 31 1 233 491) and I have been told that the center spacer from the wheel (36 31 1 257 606 or scrounge one up from a wrecked wheel) can be cut down to make nice take-up’ spacers.
Hugh Kenny #6051
Cheyenne, Wyoming
