Sidecars on Your BMW Airhead Motorcycle
This article was originally intended to be a series of articles on sidecars and sidecaring. I decided not to do multiple articles. I update this article now and then, date of which is at the end area.
In this article, I have included a considerable amount of my own travails in building my first street-going sidecar rig. I was exceptionally anal about building it to be very strong and reliable with very good handling. YOU can take advantage of all my work over the years, GREATLY simplifying YOUR work, by reading carefully, and referring to the Author’s website articles on sidecaring, which have many photos and technical details & descriptions not in what you are now reading. You can save a LOT of time and cost. There are also articles on how to drive a sidecar rig, and many hints and things to know. https://bmwmotorcycletech.info/index.html
copyright, 2021, R. Fleischer (AKA Snowbum)
………………………………………………………………………………………………………………………………………………………………………………………………………
In my earliest Airhead days, I wrenched-on & raced sidecars: BMW /2 and some on the /5 bikes. I won’t go much further here into my track or dirt racing (2 and 3 wheels, BMW, Norton, Vincent). For sidecar racing, during and after my initial position as Wrench, I was often the ‘monkey’ on the platform. Eventually I became the driver. Back then, I NEVER did any sidecar driving on the street. Over the many years since, I became more interested in street type sidecar rigs, but did nothing, besides attending many sidecar rallies; in particular, the ones held in Griffith Park, Los Angeles area. I was there on 2-wheels….at least until the turn of the century.
In 2000 I drove a few miles in the countryside on Hal Thompson’s factory Ural rig and found it lots of fun, although I felt awkward (my lack of recent experience no doubt), and it felt very tall, no doubt due to the fact that a racing sidecar rig is VERY low to the ground. I began thinking more seriously about building a rig to compliment whatever solo bikes I had. There were other reasons too… I’d been suffering for years with back deterioration; and thought then, that the handwriting was on the wall for my dirt riding, let alone solo road riding. I also wanted something ‘different.’ After 850K or so on motorcycles I was occasionally bored. I had some adventure touring in mind and thought that now might well be the time to have a sidecar outfit for myself. Serious attention to back exercises has since kept the deterioration of my back to a minimum, although still troublesome. I couldn’t foresee giving up two wheel riding, until maybe in my eighties. But the idea of a sidecar rig WAS…and REMAINED… very appealing.
In 2001 I built a sidecar rig for the street, an R100RT-Ural rig. It was very stoutly built. I had it for quite some time. Some years later I purchased a rig and modified it extensively to my particular tastes, a K1100LT-EML rig, with EZS tug equipment. I used both rigs on the street, occasionally hard-pack dirt roads, and sometimes drove them on ice and snow, and put a lot of long distance touring miles on the K bike rig, with my wife sometimes in the chair. Over the years I have worked on a lot of street-going sidecar rigs that belonged to other folks. I have seen some good rigs, and some awful rigs. Sidecars need to be built Hell-For-Stout; and with a very considerable amount of thought put into the over-all design. They also absolutely must be aligned correctly, which is easier said than done.
Sidecar rigs are also known as ‘Outfits,’ ‘Combinations,’ Gespanne, and ‘Hack-Rigs’. The sidecar itself has had many names, including Hack and Chair. Rigs are a lot of fun, & often attract a lot of attention from folks who would never think nice thoughts about motorcycles and motorcyclists. They can also be a PITA to learn to drive. They do NOT handle like cars, nor trikes, nor motorcycles. They change their handling characteristics in accelerating and in braking, and handle totally differently on right turns than left turns. They are affected seriously by the changing crown of the road. They are more difficult, in some ways, to ‘drive’ really well, than riding a motorcycle; and can be more physically demanding….or, at least tiring. But, they are a lot of fun! They are also one of the better answers for those who want to be ‘in the wind’ but have physical limitations. Sidecars are NOT, however, just for ‘old guys’. Sidecars allow you to ‘motorcycle’ even in the snowy Winter. They can carry a LOT, and even a single wheel drive sidecar rig can be usable on ice and snow.
If not set up (aligned) correctly, a sidecar rig can wear you out FAST, and make you wish you had truly huge and exceptionally muscular shoulders. A fair amount of knowledgeable time spent on design and alignment will be very helpful and worthwhile. They DO enable you to carry a lot more ‘stuff’…whether it be the kitchen sink….or the family dog. Heck, they also will carry your better half AND the dog AND a lot of gear and beer.
There are drawbacks. You will give up white lining (lane-sharing, also known as splitting lanes… that is, riding between stopped cars in a freeway traffic jam). Expect fuel mileage to go downwards a goodly amount, and average speed will likely go down. Costs for maintenance will go up some. Your wallet will be emptier, as rigs are not cheap, and require additional maintenance to be done. USUALLY, the additional maintenance and other costs are mild to quite moderate….particularly if the design and construction is good to begin with.
I had reasoned, wrongly, that my back condition was going to get much worse, and my 2-wheel riding days were soon to be over, so why not get into sidecaring right away. These things led to a Senior Moment ….and wrong decision ….to sell my 1983 R100RT.
I did a lot of investigating and chatting with a whole bunch of folks who had street sidecar outfits. I did a lot more than just gawk and talk at the annual Griffith Park Sidecar Rally, which I had attended so often, even with my race rig on a flatbed truck a few times, all for so many years. Some of these folks are very well known in sidecar circles. In particular, I spoke a lot with Doug Bingham, aka Mr. Sidecar, who died in 2016, he had been a very strong competitor in my XC sidecar racing days. Transitioning from racing to street driving was made easier.
Shortening this story, …my decision, ….before doing the 1983 Airhead rig, was to purchase a larger size of used rig capable of covering large mileages in relative comfort. I decided to go first class right off the bat. I also wanted something ‘affordable’, meaning a price I thought I could live with (Pacts with the Devil were not to be considered). After much frustration, which does bad things to people, even me,….I started thinking of spending REAL MONEY……..gads…horrible thought!
The idea was: A good used K1100LT or K1200LT, which have lots of horsepower and torque, always nice to have on a sidecar rig…and a new EML chair. Yes, that was the way to go…with some help from a finance company. I came within $200.00 of a deal on a K1100LT without a sidecar attached. Stubbornness over the $200 kept me from that rather nice K1100LT…which would have meant another $20,000+ to convert it to a full EML. This was just as well…as I did not know the REAL over-all pricing THEN for EML. I procrastinated on that bike long enough for the owner, also stubborn, to find another buyer. The final ‘save’ from K-whiner ownership (then) came when I found that the price for a NEW completed EML rig, with a good used K, was going to be close to $30,000.00. As I typed an update in 2017, the price for a comfortable powerful road rig, with new motorcycle and new sidecar, ready to drive, could reach $50,000. But, just 15 years previously the only place in the United States that imported and put EML rigs together, was BMW of St. Louis. I actually started to do something with them, …luckily THEY dropped the ball. They went out of business awhile later.
I thought about a brand-new Ural combination, in 2 wheel drive. Couldn’t bring myself to do that, the Ural did not have a record of good reliability–it has since improved–STILL not good enough for me, and I wanted much higher cruising capability and comfort. I also really wanted an Airhead for my first street rig, as I knew Airheads quite well.
A lot of thought was put into the possibility of obtaining a R60/2, or /2 frame, with Earles forks, and converting to a later Airhead engine and drivetrain. I even thought of using a Ural, with a late Airhead engine and Ural transmission (which has a reverse gear)….not as simple as it sounds.
Finally, after a lot of soul-searching and looking, testing, & thinking, I gave up all of my ideas when my old 1983 R100RT came up for sale. I purchased it back from Rand Rasmussen, after it being away from me for 7 months. In late December 2001 I ordered a brand new Ural (Russian) sidecar, properly imported with the U.S.A. specifications and certifications. The sidecar arrived, via truck, in late January 2002, and sat in Salem Oregon until Hal Thompson was kind enough to personally truck it to me in S. Lake Tahoe.
I knew that almost no one converts a RT faired Airhead to sidecar use, mainly due to the unsupported anecdotes about the fairing falling apart, and also as a substantial hole in the fairing is needed for the front upper support for the sidecar. I did it MY WAY….(of course!).
I started collecting ideas, and made sketches. I started work on the RT, so that it would be in reasonable condition before actual conversion began. With pressures of my regular work, chores, hardly much of a social life; and, the usual procrastination, things went OK, if slowly overall, but in spurts. There were plenty of serious considerations, lots of pondering, lots of thoughts on how to REALLY DO IT CORRECTLY…Hell 4 Stout too.
Conventional front forks are not very strong for side-forces, which sidecar driving produces, and conventional telescopic forks have a fairly large ‘trail’ which means a LOT of steering effort when driving a hack rig. A much shorter trail is really needed for reduced steering effort with a sidecar, especially on long trips. Often any modification for a short trail means that the ensuing rig is a dedicated rig, sidecar use only. I decided that I did not want telescopic front forks, not even if the triple trees were modified for a short trail. I note here that MANY HAVE found that modification quite OK. Modifying telescopic forks for a short trail can be relatively easy, or it can be a hassle, and the only advantages in the slightest, is the lessened steering effort;…and that it is MUCH cheaper than purchasing a dedicated Leading Link front end. I could have designed and built a LL front end, of course. There are disadvantages to offsetting the Airhead telescopic fork …& several ways to do it too. On a bike like a Gold Wing, and a few others, that is possibly the way to go. For my needs (well, wild ideas, that turned out to NOT be so wild, as I drove my rig in the boonies a lot), the best setup was a VERY sturdy Leading Link front end. This can be done with any trail one wants, can even be made to be adjustable for trail, and is very strong for side forces if designed and made right.
I strongly wanted a leading link front end, it is like power steering when a sidecar is attached. Those of you who think power steering is funny, have not driven a substantial sidecar rig with stock trail on the stock forks. Even with a LL front end, you will develop shoulders. I decided against grafting a /2 Earles fork onto the RT, although it would fit. The Earles was not designed for a vastly higher horsepower engine and spirited performance by an ex-sidecar-racer. I had already built sidecar rigs for others using the BMW version of the Earles, and it was almost bolt-on for the front end, just some welding and bearings work…but I wanted something sturdier.
After some investigation and finding that an EML LL was not going to be sold new, I decided on a rugged leading link, that is adjustable, made by the small firm of Unit Sidecars/Heddingham, England, usually just called a “Unit front end”. I would have preferred a EML leading link, it is a bit more sophisticated and the raise and dive upon braking is better controlled due to the floating caliper tied to the downtubes. UNIT makes one, does not advertise it, it may have problems with tire skipping, however, upon severe braking. I have never seen one of those, and almost no one else has ever heard of them.
I could not get EML to sell me one of their front ends, nor find a used one, separate from the rest of the EML ‘kit,’ which is VERY pricey! I actually thought seriously, about making a LL front end. Another choice would have been a LL from Lowell Neff, who is often notoriously slow in delivery. Lowell’s are not adjustable, nor do they have a floating caliper…although he has experimenting with that idea. I have seen his experimental LL, as I decided to drive many hundreds of miles to visit with Lowell. BTW, Lowell’s work is first class!
The Unit front fork was ordered direct from the manufacturer in England, ordered such that the original twin Brembo disc setup and snowflake wheel would fit. The use of the stock 19″ front BMW snowflake wheel was a compromise. I pondered a fair amount about the tires. Real car tires might last longer, and may be a bit more stable at low speeds, but would result in quite heavier-feeling in handling, follow road irregularities, and a costly modification for no substantial benefit for ME for THIS rig. For the rear tire on a sidecar rig, auto tires are generally better, as they last MUCH longer than motorcycle tires. Additionally a 15 inch auto tire results in essence, as a higher numerical rear drive ratio, which is desirable. I intended to do more than just be on a paved road, and the expense of converting to a rear car tire was considerable. For off-road trailing, enduro/trials type of motorcycle tires are better, the way I intended to go, sort-of…with a dual-purpose type of Enduro tire on the rear in the Winter, a standard motorcycle street tire in the Summer, and I could always install a flat tread sidecar type tire on the front, as Avon makes such a tire in 19″ size that fits. Meanwhile, I left the K491 Dunlop tires on the bike, even after the LL conversion.
Here are some details on sidecar driving, to help break up this long piece:
With a conventional sidecar (the bike and sidecar are mechanically rigid to each other) you do not lean the bike to steer it. Think slowly about the this. You STEER, like in a car. But, you have other forces at work, that can create fun and games for you. Let us suppose that you have a sidecar rig with the sidecar on the right side, and that you are turning to the RIGHT. The handlebars are TURNED RIGHT, and your speed need not be very high, and suddenly the sidecar wheel comes off the ground. Your motorcycle is now on just two wheels, with the BARS TURNED to the RIGHT, and you are suddenly having to steer MORE to the right as the whole rig had wanted to go to the left. There is a limit to this, so you, as a sidecarist, have to practice turns to the right, and you find that turns to the left are quite different from turns to the right. You do not want to raise the sidecar wheel WAY high, as if high enough (that is VERY high!), the whole rig reverts to motorcycle technique. All sidecarists have to learn to handle their rigs under a variety of conditions. When the sidecar wheel lifts slightly off the ground, a perfectly normal situation now and then, the rig is totally controllable.. MANY call this Flying the Chair…but it is NOT real flying, as far as what flying means to a true sidecarist. Flying the chair is when the chair is SO VERY HIGH, that the tip-over point of the sidecar rig is had. At that point the rig HANDLES LIKE A 2-WHEELER. Anything less of an angle, and the rig handles by regular steering. For a conventional sidecar rig on right side of road driving, as in the USA, the sidecar wheel tends to lift in a right turn that is brisk, or sharp, or both. The sidecar rig handles very differently TO THE LEFT, and the rear of the bike tends to rise and the nose of the sidecar tends to dig into the tarmac if things are quite extreme. I’ll explain that a bit more:
Think about a LEFT turn, and the setup of the sidecar…the position of its wheel in relationship to the rear wheel of the motorcycle. On MOST sidecar rigs, the sidecar wheel is NOT in line with the motorcycle rear axle, but is forward of it, from maybe a few inches to as much as 15 inches. This sidecar wheel ‘lead’ makes your rig turn nicely to the left, and the rig is stable;….until, with too much speed or turn sharpness or both, the rear motorcycle tire starts coming off the road….and the nose of the sidecar wants to lower, dig into the pavement, at which time you will find yourself tossed upside down, doing a spectacular flip. Just another thing to know, learn, and incorporate your practiced knowledge permanently into your sidecar-mode brain. But this is hardly all the strange handling. Sidecars will tend to turn when the throttle is turned ON more, as well as turn the other way when the throttle is rotated more OFF. Sidecars also tend to turn when the brakes are used; but this varies with the setup.
It takes a LOT of knowledge, and a LOT of practice, ingrained into one’s automatic responses, to handle a sidecar properly….and vast experience to even approach handling one really sportingly well. Truly fast and hard street driving of a sidecar rig is FAR more difficult than riding a solo motorcycle. Those that think that sidecars are for old men with infirmities, and other such (which they CAN and often are), are not informed. Sidecars will challenge your skills, particularly if you like to go briskly. Getting into trouble is not difficult.
It is FAR easier to do fairly fast race-course driving on a purely race rig, than to do brisk twisty mountain passes on a high center of gravity road rig…especially without that ‘monkey’ in the racing rig sidecar, who throws his weight all over the place as needed. When you drive a sidecar rig (note I said drive, not ride), you may be moving your butt to one side and the other…body English. This will help your solo riding too. Few solo motorcycle riders I have followed move their butts, let alone stand on the pegs. Shame. REAL motorcycle dirt riders also understand ‘hanging off’.
OK…back to my first street rig, the 1983 BMW R100RT, with URAL sidecar:
About this time I felt it was time to get into niceties of subframes, rear suspension, access to the bike for normal servicing, ETC.
The RT needed work on the fairing due to a low speed fall that Rand had, and some electrical work to handle the sidecar, and a fair amount of normal and some other maintenance, and this all took time. Meanwhile, the Unit front end arrived. The subframes for the bike, ordered from Lowell Neff, after I decided not to build my own on this first conversion, did not arrive (eventually it did, much later, and I used it on another sidecar rig). He has a reputation for being extremely slow with promised deliveries; but he does do LOVELY work. Best not to bug him, but just stay in touch, I thought. After some discussion with someone in the industry, and gathering advice, I stayed in touch just enough to be sure that the squeaky wheel got the grease. I also did my best to remain friendly. I made a long trip to visit him (I really LIKE Lowell…a LOT. He is a REAL craftsman, with a huge machine shop he runs all by himself….from a wheelchair!!)….I learned a lot from that visit. In any event, I did my own construction, and it was made truly stout, with my own ideas about things. As you read this article, keep in mind that I am a trained engineer, with a lot of experience at designing things and building things….and, if contemplating building a sidecar rig….I suggest you ‘see how Snowbum did his rigs….’.
Sometime in this time period I made a point of taking sidecar guru Doug Bingham (Sidestrider.com) to lunch. Probably would have done the same for Jay Giese (Dauntless Motors), but he was up in Washington State. Doug and I had a fine old time comparing our experiences, when we both were racing at the same time so many years ago. You should have been at the luncheon table, when Doug and I compared a lot of technical ideas….and, fun stuff when we raced against each other.
The brand new hack needed some work, I was especially disgusted at the Russian wheel hub innards as shipped to me, and all the seams needed special sealing, that sort of thing. The hack mountings were designed for a /2 airhead, well, actually the Russian Ural bike…and those would need extensive modifications too.
I joined a sidecar organization, and subscribed to Hack’d Magazine. I eventually subscribed to TWO sidecar lists. One of them, the Yahoo Groups SCT2, was VERY active and I became a Moderator on that LIST. I made contact with David Hough, whom I had met at Redmond at the 2001 BMW National, and found that he had converted a bike similar to mine, but not a BMW RT fairing, and we had E-mails flying back and forth. I purchased some back Hack’d issues, one dealing with his Airhead rig, and later David was kind enough to send me a couple of pieces of Russian steel tubing from a wrecked hack. I wanted to widen the track…and gain more access for service for the right side of the RT…and wanted the exact same tubing. We also discussed a modification idea I had that allowed the nose of the hack to be adjustable up and down, for the alignment I wanted to do.
By the end of March I had pretty well gone over the hack, having only a few problems, one of which was the Russian reverse-design of the wheel bearing preload, it being delivered wrongly assembled, a part missing, and the proper fitting of the hub parts finally was figured out. It is truly amazing how something like that can take a lot of hours of analysis, and E-mails and phone calls flying back and forth, etc. Wagner’s, exclusively Ural, was the final and decisive help in this matter…Thank You’s to Michael …and his VERY attractive co-owner, Felicia… 🙂 (better known as Flicka) …..and I ordered a bunch of Ural sidecar parts from him…(some were spares);…and, made a mental note that if I ever purchase a Ural rig, that I will go out of my way to deal with them….even so far as flying back East. I am VERY loyal to those who go out of their way to help me. The reverse is also true.
I was working on the sidecar rig when I had time and/or was not too tired. By May 2002 I had the RT fairing pretty well modified and repaired although hardly pretty, figured I would finish it over the 2003 Winter. The bike was cleaned up considerably, and many mechanical and electrical things were done to it.
A sidecar puts enormous forces on the motorcycle frame to which it is attached, particularly when going around corners, but also from bumps in the road. The sidecar I selected weighed, I think, 245 pounds empty. That puts it into close to a heavyweight category, nice for not lifting too easily on right cornering, but also adding to forces. It would have to be mounted such that forces on the BMW frame would be taken care of by rigid and well thought-out beefing up of the frame, and structures added to the frame, to pick up numerous mounting points, such as the engine mounting bolts. The steering head and two other …possibly three….areas needed to be strengthened such that forces are applied to BOTH sides of the BMW frame. This is easier said than done. Especially, if one intends to do regular servicing on the motorcycle, one needs/wants decent access….and not by cutting and rewelding items each time. As a matter of fact, I was able to avoid ALL welding on the bike frame, a VERY desirable idea to me.
Sketches and plans were drawn. As mentioned previously, I had lunch with Doug Bingham and pumped him for information, and found that I was already doing just about what he would have recommended! I stayed in contact with Lowell. I worked on the bike when I had time and energy.
Frankly, I think these guys (and, a few others I consulted) were thrilled that I was building a rig that ‘went all the way’ towards design, function, strength, ETC ETC.
By May I had found time to install the leading link forks, a fender, and stock dual Brembo calipers. I removed the right side Luftmeister gas tank, as it would be in the way, darn it!, for the upcoming upper rear hack attachment. I did not want to cut that tank…some have done it, photos of one such are on my website.
Brakes are an interesting situation. On a telescopic fork, applying the brakes causes a forward and upwardly angular force on the forks structure. For a drum brake, the forces are more or less distributed as a force pivoting around the front axle, and upward, and no adjustment by design for direction is available, except by moving the axle in relation to the fork. A disc brake is quite different. Depending on where,,,and how… a DISC type brake caliper is located, the force could be just about in any direction to the forks. On a leading link front end, there are TWO common methods of fastening a disc brake. The more complicated, and more sophisticated, is to have the caliper floating, fastened to a plate around but NOT clamped to that axle, it floats, and a rod will then come backwards to the downtubes. This can be of some considerable advantage as basically all the braking forces are applied to the downtubes, although backwards in direction…and the downtubes are typically VERY stiff and strong on a LL and reasonably strong on a conventional fork. This type of design on a LL is far more tricky than first glance might indicate, as the suspension COULD lock up during heavy braking, making for a bad tire-skipping ride, let alone braking. The other method is to have the brake caliper bolted to the lower link. If you picture this in your mind you will see that depending on where the caliper is mounted, in not only distance from the axle, but where on the circumference of the circle made by the disc, the front end can RISE quite a bit upon braking. This is the opposite of what telescopic forks generally do. (Yes, I know the Telelever can be rearranged for rise, dip, or neutrality upon braking). One can arrange a LL front end the same, in some ways. The Telelever concept is not good without serious modifications for a sidecar conversion on an Airhead…yes, I thought about it. My modified UNIT LL forks are adjustable for some rising/falling effects, and adjustable for the amount of trail. I decided that a floating caliper was NOT needed for my particular rig. That type of floating caliper CAN have disadvantages…the main one is that it can prevent the suspension from working!…causing skipping on the road surface. As it turned out, my decision was sound. I should note here that my present rig, a K1100LT with EML chair, has full floating front brakes and floating calipers, using a torque-link…and works fine.
The stock 1983 BMW-R100RT Brembo calipers were mounted mostly downward on the lower link. The one problem with this setup was trying to INITIALLY bleed them, as the ports on each caliper are considerably downward, and the system had to be opened for longer hoses….opening a braking hydraulic system is always something to be avoided. A few simple changes, and braking was found to be quite decent.
My calipers were removed for initial bleeding, to have the ports vertical. To make matters far worse, the stock hoses were not long enough, so aftermarket hoses of very high quality were installed, which necessitated that mentioned opening of the system…adding to severe bleeding problems. I spent a lot of time trying to purge air from the system after it was assembled. A pressure bleeder, that forced fresh fluid in from the bottom was needed for the final bleeding. I eventually got the brakes working, but needed considerable miles to equalize the extremely small angular changes on the pads versus the discs.
When I found time…and energy….I did other things to the bike and hack, and one of those things was to put a blinking red LED into the top molding on the windshield and devised a simple circuit for the sidecar passenger to notify me by turning on that blinking red; so I would then look to the right and see what was going on with my passenger. I have not yet figured out how to train OTHER passengers, the 4 legged types. I also designed an intercom circuit, installed the wiring for the various lights and power to the sidecar, a switch to turn off the motorcycle’s right side turn signals, ETC. I left the final wires and connector plugs unfinished, pending the marriage of sidecar and motorcycle. I designed a dash for the sidecar (never built it); set down some ideas for locking the sidecar ‘boot’ (trunk) (never built it); thought about ideas for a speedometer/odometer for the sidecar passenger; thought about how to make the trunk easily convertible for ‘sidecar dog’……
As Summer of 2002 arrived I was still irregularly working on the bike, as I added things to my list of modifications…and did some considerable regular servicing. During this period of time I installed a 3.36:1 rear drive, removing the 2.91:1. A few more test rides, and then I did a major change to the carburetor intake air system that I had been contemplating for a long time. None of the test rides went more than a handful of miles in town. The sidecar was still not mated to the bike.
I rode the bike, still without sidecar, to the May 18th Minden TechDay, followed by some fellow riders, and found myself gearing down and slowing down to let them catch up…as I had a great tendency to want to ‘play’. Probably my familiarity with the particular mountain pass & just the exhilaration of being ‘back in the wind again’…but, after a few turns in the twisties and finding the LL front end to not be at all twitchy, and in fact it handled BETTER than the stock RT telescopic forks!….I really turned the throttle on a few times. I did not have the nerve to try to slide the bike though on a tight twisty mountain pass. The shortened TRAIL made for NICE handling, and did NOT exhibit, in the slightest, the ills that had been predicted by so many know-it-all types.
My Ural wheel parts had arrived, and the hack wheel hub was finished quickly. I made special wrenches for the hub, in case I would have to service it on a trip. In fact, later on, I made up QUITE a tool kit for the rig.
I stayed in touch with Lowell Neff and found that he had finished my frame part, and it was being sent out for powder coating. I was finally seeing the light at the end of the tunnel (I foolishly thought)…and began to work more earnestly on things. I had reached a point in which I really needed to make subframes, frame beefups, etc. However, the bike could be ridden if I did not get into those major projects, and I was very loathe to have the bike unusable for a period of time, so I procrastinated considerably, doing house and yard chores and trying to keep my retail customers happy. The delay was probably a good thing in the long run, as it gave me lots more time to think, set down thoughts on paper, and think again. My roommate was hospitalized, and he only slowly recovered; that put a modest crimp into my plans. Is this all beginning to sound like one of YOUR projects??
Some things I had not yet worked out. I was not at all sure about how much, if any, to widen the track (distance from hack wheel to motorcycle wheel), nor how much lead the hack wheel should have (forward of the rear wheel). I was going to modify the existing mounts on the hack…that meant using the pieces of tubing that David Hough sent me…Russian metric size mild steel tubing. I knew I would chop off the fixed front lower mount and weld on an extension AND a rotating J mount, something like the lower rear mount (it, too, needed a welded section inserted). I also wanted to ‘beef up’ those mountings, so that they would have strength in all directions, for large loadings. My aim was, perhaps, over-kill in that department, but I intended to ride off-road now and then…and I mean REAL off-roading.
On top of all the foregoing, I had been monitoring and participating on the Airheads LIST & modestly busy sidecar LISTs. I was spending too much time at the computer every day. I was putting in WELL over 100 hours a month on the computer. I resolved, anew, to refer lots more private message senders to the Airheads LIST for technical questions. I was finding out that inquiries were not always from LIST folks either, as some had seen my stuff through Internet searches, or from IBMWR, etc. I did take my e-mail address off my website articles, added a note on it to contact the Club’s .org website;…perhaps that eventually helped a bit.
For the Independence Day weekend (4th of July), I arranged to be in Palm Springs where I was doing chores at my condo, and then I drove to Dragoon, Arizona, to visit Lowell Neff, then to San Diego to visit someone, and then to the condo again, and eventually back to Tahoe. Whew!
Back at Tahoe, I now had the subframe ready…at least I hoped so, could not tell for sure until I actually started to mount it, which was rather involved. Subframe is used kind of generically here, as for me it is not just a right side added frame. What I mean here is that I also have a separate upper front mount, made to fit at the original oil cooler area, yet allow the cooler to remain in stock position; and, a frame beef-up piece, which will tie the rear area, crosswise, in the tool tray area. There are also bits and pieces that are added to make a complete frame system.
An idea behind all these things is that forces from the sidecar will be put into the RT frame at 4 places:
The front upper diagonal sidecar strut mounting will be to the steering head area, specifically near the factory frame cross piece, at the oil cooler. This will distribute sidecar forces to both right AND left BMW frame downtubes. The lower front sidecar mounting will be to the front engine mounting stud and the rear engine mounting stud, using a massive separate sub-frame of steel, and this will automatically apply forces to both frame sides. The rear upper diagonal sidecar strut mounting will be to that mentioned area at the tool tray, which, with a cross-piece, will apply forces equally to both left and right frame tubes. The cross-piece was made on a lathe and milling machine. In addition to the above, very specific areas down near the right side foot peg, and the area above it, were tied to the subframe assembly.
The whole idea is STURDINESS, yet well-distributed forces…. to avoid overstressing the BMW frame. The main subframe was built of heavy steel tubing, TIG electrically welded, with added bits welded to it that had been made on a lathe/mill.
The subframe was made in a jig, produced by measurements and fitting to a 1982 or 1981 BMW airhead frame. THAT was a mistake! read on…
July 10th I took the RT out for a ride, for handling tests, now that the leading link was installed and other things done. This was a short ride, mostly spent in a flat practice area. The idea was to get a feel for handling at very low speeds. This included U-turns for handling and testing out the last work I did on the brakes. Very hard braking was done, paying attention to the extending of the leading link fork arrangement, stiffness of the shock absorbers, stability, etc. I had done the high speed tests as previously noted. I found no faults, and was pleased to find the front braking to continue to improve. I could now cause the front tire to chirp on dry asphalt with reasonable lever feel. This is with the stock 1983 Brembo calipers, discs, and pads. NO instability of any kind was noticed. Thus satisfied, I set the RT aside for the future work on installing the subframes, brackets, ETC.
I had customer work and chores, and after some weeks, I got back onto my sidecar work. I removed the lower right fairing and oil cooler, undid a lot of things, and mounted the upper right sidecar mount near the oil cooler mounting area. I left the cooler off its mount for the time being, as I tried to mount the lower subframe. The lower subframe had SERIOUS fitting problems. This was a major blow….something I had worried about. It appeared that since the subframe was made using a frame from a 1981 or 1982 bike as a pattern, that there were AT LEAST two frame differences between that frame and my 1983 frame. I had also recently acquired a 1984 R100RT (gotta ride!), and it had a frame similar to my 1983 R100RT. This is NOT the first time this sort of thing has come up unexpectedly when working on Airheads.
I contacted Lowell Neff, who knows more about BMW frames than I do, as far as mounting sidecar subframes. There was nothing more I wanted to do at the moment regarding the mounts. I simply was going to wait to see what Lowell found out. I sent the main subframe to him via UPS. He managed to get someone in Tucson who had a 1983 bike, to bring it by a few weeks later, and it was only a couple hundred serial numbers different than mine, so Lowell could take measurements. Lest someone question this situation and ask why I did not simply modify the subframe to MY bike, there are a number of reasons, and I sure did not want to strip my bike to a bare frame. Lowell had the jig items, and was set up to compare UNstripped frames.
I had other work to do, many tens of hours of work needed on the newly purchased 1984 bike, and work on other bikes, customer’s repairs, chores, work on my truck…many other things….a long list, so I did only the most minor jobs on the sidecar motorcycle…but doing a lot of measuring, and thinking and sketches. The pondering did lead to some interesting ideas. I found it kind of interesting, although a PITA, these small changes BMW made to the frame, most of which were certainly not normally noticeable without one being told of them. I found no good reason for one of the changes, beyond, MAYBE, being a few minutes cheaper in production.
At the very end of August, following a 1400 mile bike and mental shakedown trip on the 1984 bike, I was ready to play subframe games again on the 1983 bike, amidst all my other responsibilities. Lowell had gotten the information on the needed subframe changes, and had all the information after we chatted back and forth a few times, to iron out some questions.
Now the subframe could be reworked. This was done. Some minor issues arose, these were promptly taken care of. Besides that main subframe, the cross-frame support needed to be complete before the subframe could be permanently affixed. I continued to do some work on the 1984 bike, keeping it in rideable condition at all times. I was also working on the sidecar bike…and…FINALLY!!, the subframe and cross-support and upper support were all in place solidly. It was, and is, critical that everything fit without the slightest gap or angle, bending pressures or angles, etc., that could allow the slightest movement with the large forces that would come into play during driving the rig. Many a rig has been put together without this sort of thought and workmanship, to the owners lasting regret.
NOW was the time to start looking into the way the 4 sidecar mounts would fit the bike, particularly the interference with the fairing upper, and lower, on the right side of the bike.
I intended to modify the sidecar distance from the bike–the track width–adding about 3 inches. I was also going to make the fixed front lower mount an adjustable one, something like the rear mount. I needed to do a lot of thinking about not having multiple fairing modifications, before and after those sidecar mount changes. I had to think about the proposed electrical umbilical cable. Now was the time to study & revise notes & make more sketches, and do some pondering. One would have thought I’d done enough of all this previously!….but I was very cautious. It all LOOKS so simple, NOW!
I needed a proper alignment jig, so as to be able to set and have repeatability on items like toe-in, hack nose tilt, bike lean, chassis alignment to theoretical flat floor, hack wheel lead, and horizontal tilt of the sidehack frame (yes, to compensate a bit for the normal crown of the road). Once the jig was designed, I needed to construct it. This jig would be used for reference measurements throughout the life of this hack rig…and hopefully any other I might work on. Road tests would be put on a chart, changes in alignment made, and the jig would allow any measurements to be re-usable and accurate.
Being an nerdy engineer, an elegant self-adjusting design was done up, on paper. During this designing, I suddenly realized, over a bit of single malt Scotch one evening, that a hugely simplified way of doing it would be QUITE accurate, if I took extra minutes to line things up. I admit to borrowing some ideas on this, probably my knowledge of others’ work led to this sudden epiphany. Thus, no fancy jig would be necessary…and no special storage area required for a built jig. It meant a LOT less labor, a lot less time.
The next day I ordered something like 20 feet of known flatness square steel tubing, which I cut up, to be used on a couple of 4 inch pieces of wood, etc. Voilà…my instant to assemble jig! To use the jig(s) I needed to only remove my Miata from the flat garage floor area, move the rig onto that area, find my tape measure and a bubble level and a protractor. I had a special bubble protractor which I normally used..well, mostly…for setting up universal joints/driveshafts on cars and trucks. I only need to use it once for the sidecar rig.
I still needed to purchase a 24 inch carpenter’s square…so off to the lumber yard I went. I then modified the inside area of the rear fender of the motorcycle…a V-cut, which would not be noticeable there;….for use with the carpenter’s square. How simple!….Airhead canon #2 to the rescue! The carpenter’s square is placed on the flat floor squarely, the top of the L is near the top of the rear tire, but barely behind the rear axle. The distance from the upper tire wall to the carpenter’s level indicated the lean-out of the bike (to be set). No need for degree angle measurements either, AFTER the first time. Angle measurements were taken at the rear disc using a bubble protractor.
In early September, 2002 all this alignment stuff was DONE….that is, it was constructed. I now wanted to move the sidecar next to the motorcycle, attach it temporarily, and see what additional fairing modifications were going to be needed.
Oooops!!!…that sidecar weighs over 200 pounds, and is not easy to handle by myself. I needed a dolly system, another snag, so I had to design and make this immediately. I did a quickie jury rig dolly (two actually were needed). On September 12th I had the sidecar attached at three (only) points, and…the bike was now OFF the center stand!
It now LOOKED like a sidecar rig!…WHOORAY!
The upper front sidecar mounting arm needed work. In fact, work was needed at all 4 sidecar mountings in order that the sidecar have all the adjustments available that I previous noted that I wanted. My setup was still in a grossly AWFUL situation. Some modest cutting and welding on the sidecar frame was ahead. I reassembled enough of the entire rig to allow a jaunt around the block, but no real riding as the toe-in was monstrous, and the upper front mounting was, as mentioned, not attached. I quit for the day. BUT…the rig looked, finally, like SOMETHING might come of all this work!
One of the two major problems I was now facing was how to rework the sidecar frame, which is Russian metric mild steel tubing, as I needed tools and preferably some fancy machinery. I really wanted access to machinery that could taper ream, swage, and expand tubing. I wanted access to high quality stabilized arc tig and mig electric welders. A lot of this work could be simplified for any future sidecar rig, once I worked it all out for this first one. I sure missed my machine shop, sold years previously.
I had a friend at Lake Tahoe (where I lived) who owns a 4 wheel drive repair shop capable of almost any repair. He is quite talented, and builds his own off-road ‘Jeeps’ from scratch (yes, he makes the frames too). He does a lot of customer exhaust system work and he had the necessary machinery. His pipe bending/etc., machine was an industrial heavy duty hydraulically operated machine, JUST what I needed…and he had mandrels for it.
I convinced him to let me bring the rig to his business….and even convinced him to …gads….HELP me use HIS machinery. I even promised to pay him for whatever time he had to take away from his regular customer repairs. The problem was working my project into his schedule. We were to talk about that sort of thing in depth, on the 16th. I knew I’d have to push on him a bit, didn’t really want to…but….. I figured I had about a month to get the rig totally together, a month to do serious testing, mess with alignment, and have the rig capable of a long trip. I needed to allow a few days to work out any bugs. My goal, as it had been for many months, was to drive my own rig to the big yearly Griffith Park Sidecar Rally. For 2002, this Rally was in its 31st year. One way, via stopping after 483 miles at my condo, would be over 600 miles. I sure did not want problems on that trip. I never did get around to deciding…then…..how to fix a flat rear tire, if such happened.
Lilli wanted a visit from me too…and by the time I went back to Palm Springs, and then Tahoe, I was sure I would have 1600++ miles on the rig…NOT the type of trip to be unprepared and untested for. BUTTT…no matter, potential problems or not, I was committed. …the first trip on the rig would be over 1600 miles!
Friday September 13th (how appropriate!): Too much to do, too little time, and worry about getting my rig to, and using Al’s 4WD shop was not helping my mental state of being. I was also in the midst of preparing for my once every few years appearance at the local Flea Market….with a truckload of household and electronics shop items. I’d been checking a few of my electronics sale items for proper operating condition and loading them into the truck, every day,…a bit anyway….for a week. I forced myself to relax at midday by taking some time off just to sit in the sun, reading a bit from a book from my library…on the life of Cicero. BUT…..today was the day the rig was to be pushed out of the garage, down the wee slope, and….engine fired up….and ridden/driven…around the block.
Would the sidecar frame break in half, or some other calamity arise? Would the ride/drive around the block, and on only 3 jury rigged mounting points, with a very far off alignment….be OK?
End of day, September 13th: I now have a total of about 300 feet on the rig. It started, I took it to the corner, turned around, made a few adjustments, back to corner (I have a corner house)…several times….back to garage. Top speed reached: perhaps 5 or 10 mph. The rig is almost UNcontrollable…terrible headshake, awful toe-in…. BUT,…IT RUNS!!
Next step was to use my friend’s shop and his big electric welder and his metal fabrication tools and equipment…..(and, convince him to help me a bit when I needed an extra pair of hands)….and all during his business hours! I could do much of this myself at my own garage…but, for me to make up mandrels and hydraulic adapter devices to change frame pipe dimensions…and much more….is not a nice thing to contemplate. I did what I could at my own place…and…then…I finally managed to get the rig adjusted to a bit better handling, but…BUT…, still with horrible toe-in, tilt, and God Knows what other alignment miseries, and then I drove it 7 miles to my friends shop. I never got over 20 mph, mostly it was 5 mph, as it would either suddenly dash for the left side of the road or start a most terrific tank slapper I was having fun with all the cars on the main highway who could not know, understand,….nor quite tolerate…my miserably slow speed. I did my best to stay off the main highway.
My friend and I discussed things for quite awhile, and I returned the next morning to start a new series of discussions and measurements. Since we see eye to eye on how things generally should be done (“hell for stout, think 20 times, cut once, nothing is ever too strong, anticipate everything…”)….we had perhaps another couple of hours of chit chat, this time on specific things to change. We tossed ideas back and forth (always the best way, especially because we LISTEN to each other). While we agreed on methods, we had no exact data, only generalities, as published in magazines such as Hack’d, and in other –even more formal– publications from the various branches of the sidecar ‘industry’….certainly a misnomer. A street hack rig was NOTHING like the racing rigs I had experience with. I had gotten a copy of a 1996 article in Hack’d Magazine, in which David Hough had attached a Ural to a R100/7…but my installation had some big differences. I had made numerous inquiries. Folks did just not agree on things like track width; frame on sidecar wheel higher than frame on left side of sidecar?;…by how much?…WHY?….and on…and ON…in EVERY case of any dimension or setting…the WHY was never answered in more than either generalities or ‘because that is how it is done’.
Only in a very few instances was a vigorous treatment done ..where?…you guessed it…a German publication. Of course!
From most publications and other media, advice came with information on how horrible the handling would be if ‘not done RIGHT’…but the RIGHT way was never exactly specified. Also, some very distinctly different ideas on alignment were found.
ONE example: One school of thought on toe-in is that a tiny bit is needed to avoid a high speed wobble, and to preload the side movement of the wheel bearings. Another school of thought is that toe-in is to counter the drag of the sidecar….and this tends to be wishy-washy with setting the bike lean-OUT to also compensate for the SAME thing…well, almost. A nice merry-go-round. MUCH ‘common knowledge’, as I found out over the years during and after my build, is WRONG!
The sidecar situation is such that there are not lots of every type of conversion…much is cut and weld as you go until you find out what works for YOUR particular bike, YOUR particular sidecar, YOUR particular xxxx…..you get the idea! There was no way I would do that…I am a nerdy engineer.
I spent a BUNCH of hours figuring out what is wheat, what is chaff. ONE thing I did, that did well for me, was to totally back-off; sit and think. When I read or was told something, I went back to solid engineering, questioned, asked, re-questioned. I finally had enough knowledge to KNOW that many have wrong ideas, and some are very good at building sidecars, some are not good at all. I was beginning to become VERY knowledgeable, and could now apply sound engineering principles, which I should have been totally doing from the beginning…..and listening much less to so-called experts. I certainly can now separate them out. I lucked out, because it was easy to see that my frame and subframe, etc., work, was top-notch, rather far beyond the average. In fact it was, by any common standards over-built, and hell-for-stout. Whether this is because of my engineering and racing hacks background, I do not know. I’ve done a number of hack jobs since this one for others, not one has ever broken ANYthing and some are driven in very rough conditions. But, I was now ready for alignment changes. There was NOTHING wrong with my subframe, my mounts, and all the allied things. ALL my present woes were in the alignment.
My friends’ shop is closed on weekends….only fair that I LET him have his weekends off….riiiight?? Thus, nothing gets done on Saturday and Sunday. On Monday the 23rd of September 2002, we decided which way to go for the START of the modifications that would allow the alignments I now wanted, and then what we’d do from that point onward. Real work began on the 24th, and the following day the sidecar was de-mated and mated again, and the temporary just modified rear “J” connector installed during one mating, and such niceties as wheel lead, toe-in, lean, and side to side leveling played with, and measured, again and again. We were, as we had hoped for in previous measurements, able to get the 14 inch wheel lead down to 6 inches. Wheel lead, like most sidecar settings, is a compromise. For the type of rear suspension on the bike, six inches was expected to enable crisp handling without way-excessive nosing-over left-handers tendencies, and the lead has to be set pretty much as the first item. That we were able to get the lead down to 6 inches was VERY satisfying, and would yield excellent tire wear (the more lead, the more wear per mile). This shorter lead, 6 inches, was on the low side of what was tolerable……normal might be 9 or 10 inches on this type of sidecar rig, so my rig would require some finesse in left turns. …but would handle crisply. 6″ it was, 6″ it is, 6″ it remained.
With the wheel lead decided upon, we could now proceed with all the rest, including the standard Ural sidecar front NON-adjustable mount. It HAD to be modified extensively, made adjustable, made stouter than originally…and a lot of time was spent on deciding just how to do all that, and also how to leave it versatile enough for future adjustability. The fact that the BMW airhead has a cylinder and cylinder head right there did not help things!
BEEFY and STOUT WAS the word here, there, EVERYwhere….. BTW…those words do NOT necessarily mean thick metal and grossly large welds …those are WRONG methods….thick enough metal, proper type of metal, properly designed and installed are the answers. There are ways of adding small bits of flat and curved metal to corner welds, for an example, that HUGELY increase the strength and HUGELY reduce any tendency to have cracking. Welds must be temperature normalized after welding, etc. LOTS of “ETC”.
Once completed, future adjustments would be made after on-the-road testing.
The sidecar was again detached, and preparations made for the major cutting and welding for the next morning.
September 26th: Fabrication of the front and rear lower mount changes were made, alignment rechecked, and temporary welding done on the parts. The sidecar was reattached, toe in and bike lean set to guesstimates….and I was off for test ride…ooops, I mean test DRIVE. Big improvement. Still a huge head shake at 15-20 mph, then smoothed above 25 mph;…that type of thing is common, until a damper is installed. The existing BMW hydraulic steering damper on FULL helped some ONLY. We would need, as I was previously concerned about, another damper. Dampers are a complete other subject. MINIMUM damping that does the job is the goal. Everything reasonably possible should be done to minimize their need.
With things now closer, we were able to fabricate the steel pieces to make it look nice, be very sturdy, and changed the design placement of the upper rear strut mounting, moving it so the strut would be at 90°, and the front strut will be set up to be on an angle. My intuition (or memory or whatever, since I hardly remember my engineering school classes on bridge building, some 40+ years ago, then) said that this type of dissimilar upper strut fitting (angles) would be much better, and not just from strength, but for twisting forces. Measurements and markings made, we disconnected the sidecar from the motorcycle…..as the final step in the mountings was to now add gusset plates in TWO planes, do finish welding, grinding, ETC. In other words, time to make it all strong, sturdy and neat in final form.
I spent a lot of time investigating steering dampers that evening…and for the next few days. The weekend meant that no physical work was done to the rig.
The mountings had been temporarily fabricated, and final work was shortly to be done to make it all look nice, beefing it up to long-term usage strength, and to make the rear strut attachment to the sidecar at 90°. The front upper strut would be angled. As noted, it was my feeling that a combination of angles would lead to the strongest rig, and with the least amount of flex over rough roads. It worked well, as I found out later…no noticeable flex at all.
On September 30th, the final attachments work was started. It was finished the next day, including finish work on the parts.
The steering damper situation was being investigated and dealt with in several ways: The existing steering head bearing adjustment, which was quite proper for solo riding, was tightened to the point that if the bike had been ridden solo, some low speed weaving and heavy handling would be complained about. This is a quite normal setting for sidecar rigs, where you certainly don’t feel any problems. Measurements on the fork down tubes and upper front strut of the sidecar attachment were made. Internet and personal contacts were made regarding hydraulic steering dampers that would be vastly stronger than the stock BMW one. Time was a problem now, as the Sidecar Rally was only 3 weeks away. I decided that in this beginning period I would simply use the same damper most folks use, a VW steering damper. I also ordered a fancy adjustable damper which was not in anyone’s stock. I did not have time to design and make my own damper from scratch (Did that later).
On October 3rd, at an annoying, but necessary, slow speed, I drove the rig back to my home, so as to do whatever work I could, whilst awaiting steering damper parts, Heim joints, clamps;….ETC. For the next few days, as I could work in the time, I sawed up the right side lower fairing into three pieces, reshaped them, made bracketry. I managed to retain most of the lower weather protection, without it looking too ugly. I could have simply used the original one piece lower, putting a huge hole in it, but that meant LOTS more work if the lean, toe-in, etc., needed adjustment, which they surely will.
Some more thinking and sketching was done on how to install a separate brake pedal for the sidecar brake. I had purchased a new Ural motorcycle pedal but disliked its crudeness and general design. It went permanently into the Ural parts box on my shelf, where it then went to the next owner, a few years later. I decided to modify an old aluminum BMW rear brake pedal that I had purchased from Lowell Neff (he has a big junk pile) when I was visiting him. I intended to saw the pedal, and Heliarc’d it so the lever portion was on the other side of the pedal!! I wanted the pedal mounted, somehow, to the sidecar frame, and NOT on the motorcycle frame. But, more of a problem, I wanted the two pedals close together. I had ordered the greasable special pin ($35..ouch!) and the sleeves and bolts….as used on the various BMW airhead models rear brakes (there are differences between them), figuring I would then have a better choice in making the right decision by having both variations. These did not fit; so much for SNABB Katalog errors. The aluminum pedal went to the welding shop on October 1. I did not weld it myself, as I wanted an aircraft quality job, and I did not have available THAT type of equipment. The shop was very busy. I kept gently bugging them. Finally it was supposed to be done on October 7th. I showed up. Pedal nowhere to be found, and the welder who was to have done the work was off that day. asi es la vida.
October 7th, afternoon: I finished installing all the basic wiring for running lamps, brake lamp, turn lamps, and annunciator I’d designed and built for the sidecar passenger to let me, the driver, know to stop (or whatever), and I included fused battery constant power for other, future sidecar things. I figured on eventually adding shielded wiring for an intercom and possibly a circuit to allow the sidecar brake itself to actuate all brake lights. I had previously decided on a commercial Molex 12 pin male-female plugs assembly. By the end of the day I had the wiring loomed and protected, and had installed fusing,and tested the annunciator and had installed a switch in the headlight shell that would shut off the motorcycle right side turn signals when riding with the sidecar (the sidecar has the right turn signals). All that was left was the slow job of making up the connectors, male and female pins, and protecting it all from exhaust pipe heat, making it neat…blah blah. Early evening I received a UPS package with the VW steering damper I intend to use until the fancy Shindy Daytona damper (long term backorder) arrived. Included in the package were some requested metric bolts and hardware, and 10 mm Heim joints. Custom made fork and strut clamps would be used. AH…things were happening now!
October 8th: The brake pedal was ‘found’, and picked up. NEITHER the BMW sleeve, nor the $$ greasable pin fit this pedal, as mentioned! arggggh! I checked the casting number on the pedal…yep, correct number. ARGGGGH! Just another problem to solve with minor machining of a sleeve mount.
I totally finished the electrical wiring for the motorcycle to the sidecar. Testing showed I made a mistake someplace, the piezo warner did not work for turns in sidecar-mode. Problem has to be in the headlight shell….I thought (WRONG…well, partly wrong!).
October 9th: Tore into the headlight shell. Found out that BMW had used non-standard wiring color codes for the rear versus the front turn signal lamps. This is NOT shown on ANY of my wiring diagrams from the factory, nor even the Chitech schematics. AND, yes, I have the wiring diagrams for all the accessories and their changes. I determined that what I had wired up WAS proper, but BMW had joined two wires in the 6 pole connector near the battery, rather than in the headlight. No real reason I can think of for them to do that. I strung a new wire and modified the wiring at that connector. Everything now worked correctly. Figuring this out, and doing it, took over 3 hours. The rig was now done as far as I wanted to go with it at home.
October 10th: My friend’s shop is full to the gills…I can’t take my rig there today and work on it (ARGGGGH!!!).
I was now REALLY under the gun! In not so many days I was supposed to be leaving! Looking in the mirror at myself, I was between a rock and a harder place. I examined my bank account balance.
Biting the bullet, I arranged to have an area of his shop empty and ready for me on Monday; basically I rented it…as he had to cancel/delay some jobs. This is starting to really push my timing, as Monday is the 14th and I want to have the rig sorted out….and ME sorted out on it too….and leave for the first part of my trip, 483 miles, on Thursday the 17th. sheesh! Nothing like going down to the wire. I DON’T like going down to the wire.
Nail biting time…..
Nothing was accomplished on the rig from the afternoon of October 10th until the morning of October 14th. The only thing accomplished on the 14th, as I had use of my friend’s shop only until noon, was to first drive the rig slowly there, and then set the trail, toe-in, camber, lean-out, and change some temporary American bolts to metric and to modify the fairing a wee bit more for better access to the upper front strut adjustment.
October 15th: I managed to get in a couple of hours, everything from changing some more temporary SAE bolts to metric, to planning the initial welding of the steering damper bracketry, ideas for the brake pedal mounting, etc. A lot of unexpected running around town trying to find the right metric bolts for various things. Not a great selection here, especially of shoulder bolts. I am now uptight some of the time, as I am behind schedule, and I need to get this rig done so I can test it, make adjustments, and do some practice driving, and get out of town for this weekend’s Rally.
October 16th: Got to my friend’s shop well before sunup, and spent about 9 hours on the rig. MUCH accomplished, including a very nice steering damper setup, which WORKS! No time to paint the damper attachments. Test ride showed VASTLY improved handling. Spent a lot of time making up the brake actuating system…it works!….and far better than needed.
October 17th: Previous plans…for MONTHS…”supposed to leave today for So. California”….yeah….riiight! I was supposed to have everything sorted out reasonably well, practice time in and was to leave …. 483 miles to my shared-condo….and then leave from there to the Rally on 19th….but…am running late. VERY late.
I worked on the rig from about sunup to nearly sundown. Everything is now functional, and tests on a local road (nothing really uncrowned here, unfortunately) showed stable operation to 55 mph, the fastest I was willing to go locally. Spent the evening cleaning, waxing, polishing, inspecting everything, including nuts and bolts and whatever else I thought of, and of course packing for the trip. LOTS of room for anything I might want to take…(and, nothing is packed on the bike seat…NICE!).
It seemed like I would…MAYBE…. make the 31st Annual Griffith Park Sidecar Rally after all…..hopefully I wouldn’t have to adjust lean-out on the way (ended up really needing to, but was lazy…and in a damned hurry!).
October 18th: Drove the rig to my condo. 483 miles. Lean-out is insufficient. My shoulders are very achy by the time I arrived. Must have taken nearly 12 hours for the trip, including several short stops. This is normally a 9 hour trip for me.
October 19th: I woke up in the morning feeling like I’d been driving a huge truck with failed power steering…..my shoulders did not ache so much as feeling a foot wider. I went to the garage at the condo and set in more lean-out. For the lean-out increase, I guessed at three turns increase….it was enough to reduce the effort to tolerable.
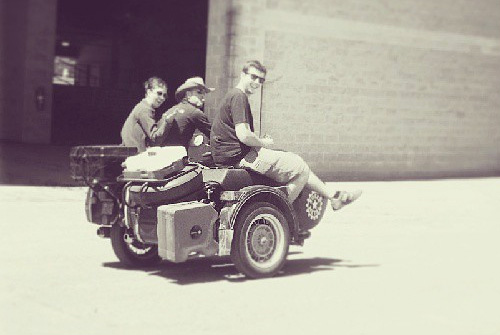
I then, on Saturday, drove the rig, over 120 miles, to the Rally. Even though it was not the official Day (Sunday is), I ran into old friends from my hack racing days. Ran into Vince Silvera who was there on a new rig…I had come close to purchasing his old R100GS-Sputnik rig. Talked with Doug Bingham again. Had a good time. Lots of rigs to look at, especially on Sunday, and I got plenty of ideas. Saturday evening I had a light dinner there (purchased a meal from some folks who cooked for the overnight campers every year….until the Park Rangers, years later, decided no overnight camping).
I woke up in the wee hours….moisture dripping on me….I then remembered that I did not put up the rain fly…and condensation and dew were falling on me from the inside walls/ceiling. I am too used to camping in the Sierras…no dew, no fog, no rain (usually). (The truth is, I had a huge bottle of dark beer before retiring on Saturday evening, and plain forgot about the rain fly….THANKS for the brewski, Vince.)
Sunday, October 20th: I stayed until around 1, maybe it was near 2. I was going to stay later, for the awards, prizes, etc., but, knowing of L.A. traffic, and of the only two routes available for me, I left early and almost totally avoided any bad traffic. I drove the rig to the San Diego area to visit Lilli for a few days. Then I drove it back to Palm Springs, where I used it daily. I loved driving it to the gym every morning. AND…nothing quite like having an electric garage door opener and driving the hack into one’s garage. Except for a bad battery, and maybe some sort of intermittent charging problem, and a burned out tach bulb for night riding, and still needing more toe-in, maybe then can use less lean-out, no real problems.
4th of November, 2002: I left Palm Springs in the early morning, and I returned to my main home at Lake Tahoe. 1835 miles since I left October 18th. Today I am very tired after a 11 hour and 483 mile day of being in the saddle. Sidecars wear you out FAR faster than a solo bike. On the trip I experimented a lot with speeds and handling. I found it quite easy to reach elevated speeds….enough throttle is left at 75 or so. But, surprisingly, I found that I liked about 55-65 mph for long stretches of highway. I suspect the rig will do 90 without a problem. I geared it, via a 3.36:1 rear drive, for roughly 107 at redline (which it would not quite reach anyway), which seems just about perfect. The front pads finally broke in squarely and the rig brakes rather well now, but I need to couple the bike rear and hack brake into a three-way (I allowed for that possibility). The ONE thing that I need to figure the BEST fix for is the gas mileage. A sidecar is a bunch of drag in the wind, and my best mileage was about 31 miles per American gallon, and the worst was about 24.5 mpg. Of course most was at freeway or open highway speeds, which drastically cuts mileage. Presently I have 7 gallons…main tank plus a single Luftmeister side tank. I thought I would eventually put a tank under the hack, between the frame rails…extra weight for the hack is good. I drove the rig all over the place for a few years, never got the tank installed.
Not all that much wear is noticeable on the tires, which surprises me. Mostly due to being close to ideal for toe-in and lean-out and other adjustments. The hack tire is the stock Russian, the bike tires are Dunlop K491. The tires are only fair in soft dirt. I noticed that any strong oncoming wind….and higher speeds….even in large radius right sweeper turns…can cause the hack wheel to come off the ground and make things more exciting. I’d practiced handling in Palm Springs on a huge flat dirt area, but I still need lots more practice. I need to push the limits a bit more on left and right turns and learn to handle the ‘flying’ of the chair properly. Eventually, over the next months, I did a lot of fine tuning on alignment, and things settled into it being a very nice handling rig.
I wouldn’t want to have ONLY a hack, until, maybe, I am quite old and decrepit or have serious physical problems. I LIKE two wheeling a LOT. …….but this hack rig became a LOT of fun. Held my weekly grocery shopping too. I expected to be, and became, active in sidecar camping and other events, as well as other events with my regular two wheel bike. I thought it might be interesting to take my next trip to Alaska via sidecar.
On Veteran’s Day I put on my Officer’s coat, etc., and drove the rig, through a couple inches of snow, to the American Legion Hall for the usual festivities. I was definitely the only person on a sidecar. Not a motorcycle to be seen either. I had some minor problems getting the hack into the street….the 5 inch ice berm and the bike’s street tires did not get much traction. Fine after I could get into the softer snow on the street. Did I mention how much fun this thing is? I had a great time driving the rig (‘look at me’) through the snow to that ceremony here at Tahoe…complete in my wool Officer’s Coat. I also learned that I needed a more aggressive rear tire…on snow and ice. Temporarily I used zip ties around the wheel. I was pleased with progress, slow as it is at times, but not overly pleased with handling….this area needed some work…but I knew from the beginning that this is a slow process.
Making up a sidecar rig of the type I had then, in the way I went about it, is a big job, doesn’t get done quickly if one wants quality. If I was to duplicate the rig, it would be VASTLY easier…all the design work is already done. In fact, since I built that rig I have built some for other folks, incorporating various improvements from what I learned with #1.
Did I mention how much fun it is? EVERYone likes a sidecar….as I am finding out when I stop someplace. I have to allow chat time. The place in Palm Springs I fly airplanes out of got a kick out of me showing up on the sidecar. So did the Tower Ground Control personnel…as I requested driving it across the runways to go visit some folks at their business on the other side of the runway. I announced myself as “BMW URAL HACK ONE, requesting…xxxxxx” 🙂
No major design changes were contemplated, maybe a fuel tank under the chair. A lot of little things and a few more time consuming things needed to be done. I wanted to improve the damper, finish painting the fairing, install more electricity….and some small stuff. For the immediate future though it was far more important to design and build some sort of jacking arrangement in case of a flat tire, and to couple the rear brake to the hack brake.
Nothing much was done until early January 2003.
A fair amount of time was spent on analyzing what was going to be done in the future. In particular, I was more than a little concerned about how to deal with flat tires, having ‘taken a chance’ on that long trip.
I started on the tire problem by purchasing one of the cheap 2 ton Chinese-made hydraulic bottle jacks, a small jack stand, and from WalMart a 12 volt compressor ($9.99 + tax). I modified the compressor for proper wiring and threw out the case, making it much smaller. I then stopped work on the tire fix problem temporarily. My intention was to modify the jacks such that they work well for on-the-road tire repairs, and eventually be storable on the hack frame, and thus out of the way of the passenger and storage compartments.
On January 9th I swapped the Nivomat’s on the hack tug for the Koni shocks that were on my solo R100RT. Nivomat’s provide a nice level ride, but sidecar rigs have very unique characteristics needed for the suspension of the tug (bike). With the sidecar on the right side (U.S. standard), when turning left, the rear suspension EXTENDS, and may do so to quite some extent. When turning right, the suspension operates fairly normally, until the sidecar wheel lifts off the ground, and if that gets extreme enough, you are then a motorcycle rider. Those things, plus the enormous pressures from the weight and various forces from a heavy sidecar, make for a need for a stiffer suspension, particularly at the rear, with somewhat differing bound-rebound shock absorber characteristics. I made a first attempt compromise by installing the Koni’s, and setting the spring preload to a modest setting, but cranking up the shock setting. Later I found that for my weight the mid-position of preload, and one position less than full dampening, was about right. I have since learned to modify Koni shocks for whatever damping I want.
I finished the pre-Winter storage chores on the solo bike, and moved things around so the hack rig was front and center for work. I then went through all my notes of things to do.
On January 21 I ‘rented’ part of my friend Al’s shop again, and drove in rain, black ice, hail, and snow, to that shop. I modified one jack so it could be used to jack up any of the three wheels. I reset the toe-in, reset lean-out, made and welded in place a modification that gave the type of braking I wanted: two pedals, linked, one operates hack brake only. The regular BMW rear brake pedal operates the bike normally, but also applies pressure, which is adjustable for shoe wear and my particular desires, to the hack brake rod. I should note here that it is not overly difficult to make a very strong, mechanical or hydraulic, sidecar brake, but one should NOT have an overly powerful sidecar brake. A test ride, in near freezing rain, proved that it is OK. Some very minor modifications might be done in the future, but the system works just fine for now. The handling was now VERY much better, VERY acceptable.
With the rig usable again, and just about all problems fixed, I did some minor wee jobs…such as finally cleaning up and painting the now-rusting welded areas and parts I had made. I also noted that the URAL stock cover did not keep water out of the sidecar very well. NOT sure how to fix that. Maybe build something to bow it up a bit. I’ll have to get a cover for overnighters. I rechecked my sidecar wheel bearing area work, it was still just fine. I noted that the stock, as new, Ural spoke wheel does not run perfectly true…so I adjusted the spokes, to about 1/16″ runout. The spokes, which are short and very stiff, were fun to adjust. I had not ‘played music’ on spokes (trued a wheel), in a long time.
I cleaned up tank scratches and did some sanding, priming, painting. Nothing real neat, a bit crude, but protective against rusting. My intention is that when all the modifications that affect it were done, I would repaint the bike and sidecar. I did more work on the VW steering damper setup. The Shindy Daytona, a more sophisticated damper arrived, it is a work of titanium-looking-art, won’t be installed right away, no time. I checked every nut and bolt dealing with the sidecar/mounts. NOTHING has loosened in the slightest. NO cracks noticed in anything. NO fairing problems either, contrary to what I’d been told by one supposedly knowledgeable sidecar ‘dealer’. Corresponded with David Hough again on minor stuff, such as rain covers, alignment, results.
I pulled the front cover of the timing chest and inspected the diode board and my modifications to it…just fine…and same for the wiring. I found excessive resistance through a brush, irregular with brush seating, and pulled the stator, and found the snail spring wrongly installed, allowing friction to the brush holder. Noting that I had never ever commented on how a snail could be mounted wrong, I made sure that was on my website and the Airheads LIST. I installed a fresh Panasonic 28AH battery, the engine was started, cover still off, and I found nothing wrong, but reset the charging voltage. I turned on ALL the lights (including sidecar lights), and rechecked…and then added a car headlamp as an additional load. The voltage held. This is the stock 280 watt alternator, with a 2.6 ohm rewound rotor, and my modified Bosch voltage regulator. I did not have time for a ride long enough to heat everything up. If the voltage holds up, everything on, after the bike is quite hot…and my heated vest on full….I will then consider the bike ready for the final items, but ready at any time for a trip. FINALLY!!!
BUT…I had to leave before I could test-drive the rig.
A medical condition arose which put a big crimp in my plans. THAT, plus lousy April weather at Tahoe, plus my various mostly medical trips to So. CA, also put crimps in my hackrig plans. Almost nothing but some planning was done for some time. The major item was a harder look at the Shindy Daytona Damper. I found it almost impossible to deal with Shindy, or any of its parts distributors, inquiries left unanswered, phone calls to folks that knew nothing. I finally gave up on purchasing anything more from Shindy, and made some mounts turned on a lathe. I refuse to have anything mickey-mouse. Much later, Shindy furnished some parts they said would stiffen the shock. I eventually found time to take the guts out of that damper and started to modify it, but decided it was not what I really wanted. Onto the ‘old projects’ shelf, back to the VW damper. I would love to end up with a QUICK adjustable damper….the type where if you suddenly go off road or into the rough stuff, a 2 second twist gets you more dampening.
As my medical condition became more critical for planning purposes for most anything, I idly one afternoon added up the MAJOR costs for the project…the repurchase of the bike, the sidecar, rental of Al’s shop, Lowell Neff’s items, etc. EXcluding MY labor, and EXcluding lots and lots of small stuff, it now amounted to about $9,000.00. About normal, I thought.
June 2003: I returned to Tahoe after 5 weeks at my Palm Springs condo during which time I had major surgery on May 23rd, a prostatectomy. I was not able to do any heavy lifting, nor a lot of other things for awhile. The solo bike and the sidecar rig sat….but some thinking was going on. Finally, well into June, I pumped up the tires and set up my own alignment jig, set alignments, and…. on June 21,,,, I couldn’t stand it any longer,…. I took the rig on a ride around Lake Tahoe…nearly 80 miles. I am sure my doctor would have strongly disapproved. Some of this included steep 10 mph-marked turns around Emerald Bay, some straightaways, generally fairly twisty. I found nothing adverse about the handling except that the steering effort was heavy. I did some bracketry work, and tested the Shindy damper again…not wanting to abandon it YET (I did though). Even using maximum 6″ travel, steering lock to lock on the damper, and damper set on maximum, there was not enough damping with the Shindy. I feel the damper needs to be taken apart and a heavier oil installed, and maybe more restrictive disc changes. The BMW 80th Anniversary Bash was that weekend, Squaw Valley….near Lake Tahoe, where my primary home is. I never made it to the Bash, reports/feedback from the first day were not conducive to me making that effort.
In July I played with the VW damper mounting angles and leverage and I managed to eliminate one of the two Heim joints, resulted in a fairly nice feel, eliminating a slight jerk upon some types of bumps, and also had plenty of damping. I also reinstalled my original modified air cleaner setup, which was much quieter, removing the modified HPN which was too noisy. I did a few other minor things, nothing of importance. In August, I finished my sanding and repainting of the left side of the fairing. I still had, I think, some sort of charging problem, intermittent, and only after the engine was quite hot. But, the rig was now rideable again, having only been ‘down’ for about a week. My list of things to do to the rig is now vastly shorter than it was some months ago.
From that point things were not very speedy either, as I was recovering from a second surgery (dual inquinal hernias) on Nov. 4th. I did find, brand new and on sale, the Ural parts to enable me to mount the large Ural rack on the back of the sidecar, including the mount for a tire/wheel, if I ever decided to get one (I did). Some modifications were needed to use the Ural parts for rack only. Also on sale was the small chromed luggage rack for the sidecar fender, and I purchased one of those…a GREAT place to put a spare can of fuel. One can never have too much room for things!…and adding weight to a sidecar rig, if not in the nose, HELPS handling! Almost nothing was accomplished until January 2004, when I was released officially by the doctors to do anything I wanted, and I traveled to my main home at So. Lake Tahoe, where the final Ural parts awaited me, and I modified a few things and was able to mount these items. With my slow recovery from medical problems, very little had really been done in the last year. I did play more with the Shindy Dampener, and decided it was just not what I wanted. Might be fine for other folks. I put my $150 or so Shindy and parts investment on the top shelf, out of sight. I eventually sold them.
The front tire needed replacement soon. I decided to try an Avon Triple-Duty, which is for sidecars…..and is a square tread. I expect it to improve the braking, as if I brake quite hard now, the front tire tends to skip….some of this is leading-link caused too, of course. I promised myself to get cracking on the project as soon as Spring showed up even a bit…and did so. I finished the design of the passenger-to-driver indicator light circuit,,,more complex of an idea than a simple light…will be a blinking LED at top of windshield, and it needs to be reliable over temperature and voltage changes and not be stressed by the 12 volt supply, so a slightly more complex than otherwise circuit was designed and tested…and I had only to install the wiring and test it. I went through a lot of hassles finding out what was happening to the electrical system after full engine warmup, and fixed it. Test rides went well….and very minor tweaks were made to alignment, each minor tweak improving the handling. The handling was now reasonably light (for a sidecar rig). Checks for anything loosening showed no problems. My intention was to finish all major items, and drive the rig on a nearly month long trip that summer….with the BMW National Rally in Spokane being roughly in the middle of the trip. I intended to do a lot of sightseeing miles…thousands actually….and I started using the rig more and more, and the SUV less and less.
I had been riding the solo 1984 R100RT, and driving the 1983 R100RT-Ural sidecar rig, off and on. I took the rig to Gary Hansen’s memorial, did some camping trips, ….the sidecar rig is mostly done, seems VERY reliable. It obviously is sturdily built…NOTHING has ever cracked, broken, or even loosened. Then, an incident. I was riding quite fast on a lesser known (to me) country road, and was climbing a VERY steep hill paved road. I THOUGHT the hill was one I remembered, with a big flat area at the top, but as I began to reach the very top, I saw, too late, that the hill fell away very steeply. The rig and I went over the top at over 70 mph, and we went through the air, not touching the pavement, for quite a distance.
When gravity intervened, we hit the road, HARD. All the shocks bottomed…the two in front, the two in rear, the sidecar one too. I bounced up into the air, then settled again.
I was sure that I must have broken and bent things.
NOTHING loosened, NOTHING bent. NOTHING broke. I was truly astounded….REALLY! After a near microscopic inspection I never worried about taking the rig anyplace after that. The only damage was a very bad jar to my already lousy lower back, which took 2 months and therapy to heal; and, I banged my scrotum and testicles….which did NOT feel very good…was so painful I almost vomited.
I took it from Tahoe to the July 2004 Spokane BMW MOA National Rally, with Lilli riding her own R80ST as my companion. FUN trip. Made a point to try to stay in the twisties of the Sierra Nevada Mountains….and mountains farther north. Put on over 2000 miles on that trip. I had put quite a few thousand miles on it by now. At Spokane, I taught some Seminars, and did a LOT of touring in Washington, Oregon, and California. I installed the luggage rack on the fender of the sidecar where I keep a 2-1/2 gallon fuel container. I installed a used rear snowflake wheel with enduro tire on the tug. I finished my tire repair kit items. I made small adjustments on alignment, and the rig handles REALLY nice. Not a lot to do, just little things I dream up. I had not decided whether or not to keep the rig, or sell it and then build a performance rig. But…it is a LOT of fun….maybe I mentioned that previously?? I had taken the rig on quite a few logging roads in the general Tahoe area, with no problems at all, and it had worked out to be the rig I had wanted FOR THEN. But, I was getting the itch for something that was more powerful, so as to cruise at higher speeds, as the Airhead works hard above ~70….and has little reserve at 80 or 85 or so. I had decided to do any off-roading on a light weight dirt bike, and do something about a road-rig.
When Hal Thompson had nicely brought me, in his small truck, the Ural sidecar from where I’d purchased it, he had told me that if I ever decided to sell the rig, he had first dibs on it. What I was getting the itch for, now, in mid-2005, was for the rig I had originally envisioned, but the $$ had been too high then to build, or, had been other problems in the way….see much much earlier in this long piece you are reading. I wanted a BMW K1100LT with an EML sidecar. I also considered a few others in this quality ($$$) bracket, like the Hannigan, etc.
As summer slowly passed in 2005, I found a K1100LT with EML sidecar that was already a full conversion. Al Olme, in Minnesota was selling it. After a number of phone calls and E-mails, I purchased it. By this time it was approaching Winter, and being of ‘sometimes’ sound mind, I decided to pay the thousand dollars it would cost to ship it to me, by a top-quality shipper, experienced in shipping sidecar rigs….instead of me perhaps foolishly driving it cross-country in the Winter. I notified Hal, and he said he still wanted my Airhead-Ural rig. He did not want to come in the Winter to get it, so it was here for me to use occasionally, and to service and prepare for him, and he picked it up the following April. He had it until …Summer I think?…of 2007, when he sold it to Tony Devevo, who still probably has it. I don’t know of ANY major problems that ever came from my conversion. In some ways, I miss it. My present rig, the K-EML rig, is not the type I would take into REAL off-road situations ….although dirt/gravel/etc., are no problem.
I still had the K-EML rig, having done MANY upgrades and MANY modifications to it since I got it in late 2005. I have taken a number of trips in it with my wife, Penny, one of which was over 5500 miles. Since this is an Airhead website, I won’t get into this rig in detail. Pictures and details on that rig are on my website.
On my website are photos of the Airhead-Ural subframe parts, the completed bike, details on brakes, and other technical things, on the Airhead-Ural rig that was the subject of this long article you have bored yourself in reading through….and, there is some information on upgrades I made to later rigs I worked on for other folks.
My website is: https://bmwmotorcycletech.info/index.html, That is the HOMEPAGE….scan down to the bottom, where there is a place to click for the Technical Articles List. Near the bottom of the long list of articles is a lengthy section of articles on sidecars and sidecaring. If you are interested in sidecaring or sidecars in general, that is a good place for some reading. There are photos of my rig, its subframes, its other modifications, ETC.
Snowbum
revision of 05-23-2017, and with very minor updating on 02/23/2021
Copyright, 2021, R. Fleischer
