

I recently bought a 1977 R100RS - great bike, I love it! But it looks like the previous owner re-coated the inside of the fuel tank and did not do a great job. The coating is feeling off in large sheets that are still partially attached to the inside of the tank. Is there any way to get this goo out of the tank? Thanks for any help!
Thanks! I was planning on doing the bb's/solvent thing, but don't know if it will take off the sheets of old coating. The coating is kind of a beige color, and seems to be oxidizing.

Agree, it's most probably a product called Kreem. It's really, really worthless stuff. There is a chemical that dissolves it, but I've forgotten what it is. You might Google that. Kreem is so bad I bet a Google search turns up 10,000 hits.
Our shop uses a 2-part epoxy product made by Caswell Plating. ( Click Here ) We've had really good results with that, especially if there are pin holes. Being an epoxy, it also works great on fiberglass fuel tanks. This stuff is the consistency of honey and ends up with a coating about 1mm thick.
Another highly touted tank sealer is by the automobile restoration people at Bill Hirsch. ( Click Here ) I've never tried it, but it gets very good reviews. This seems to be a kit containing something to etch off the rust, and a follow-up sealer.
Good luck!
Owning an old Airhead is easy.
Keeping an old Airhead running great is the true test.
Thanks! That's useful information! 🙂
Thanks!
You mean "Tanks". :cheer:
Owning an old Airhead is easy.
Keeping an old Airhead running great is the true test.
do what 8166 suggested. long long forecepts. 3 prong grabbers, ?? count your nail/ screws b4 you throw them inside the tank.
vinegar works to clean a tank, so does acid from POR-15
I used POR-15 tank sealer. . . . no i didn't want to but......... the tank seam cracked and leaked.
preparation IS everything with this sort of process. use 100% of the manufacturers product following each step of the directions to the T.
if it says wash 1hr, do so for double that. slush for 2 , double that. let dry/ stand for 80hrs, try 1 1/2 weeks.
Plugs @ plumbing dept, hardware store. the filler plug is also in the lamp.electrical dept of hardware stores.
pressure test to 6lbs.
Wow! Thanks very much! I went with vinegar and a mix of BB's and nuts. Worked well on the rust, but I finally had to resort to acetone to get the coating out. There were no holes in the tank, and the re-coat turned out nicely. Thanks, again!
Good Info!
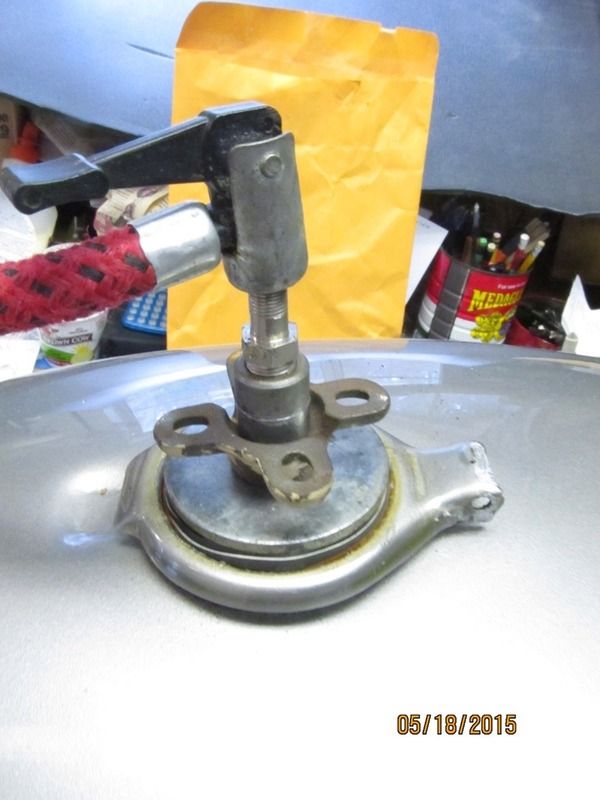
1559 could you elaborate on the plugs you used?
Anyone else, how have you gone about sealing the large tank filler hole when its a late 1970's screw in style cap?
I see this as the most critical step, if I want to preserve my original paint, and maintain that precious, hard won 38 years of patina!
Thanks
ELABORATE ??? ??
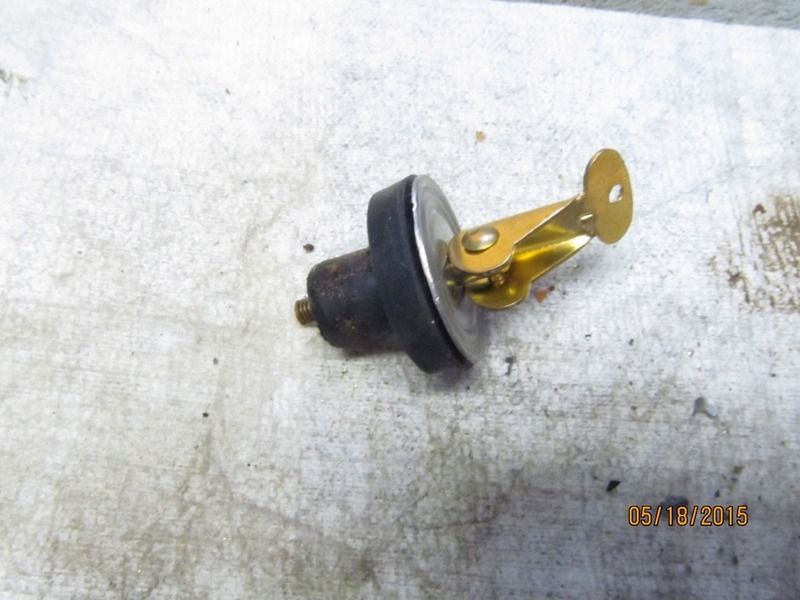
go to your local hardware store
find the plumbing dept
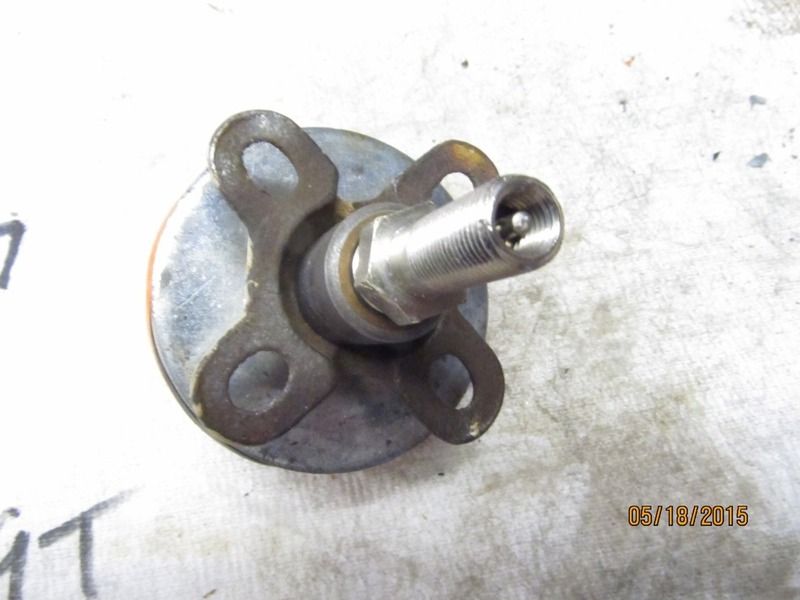
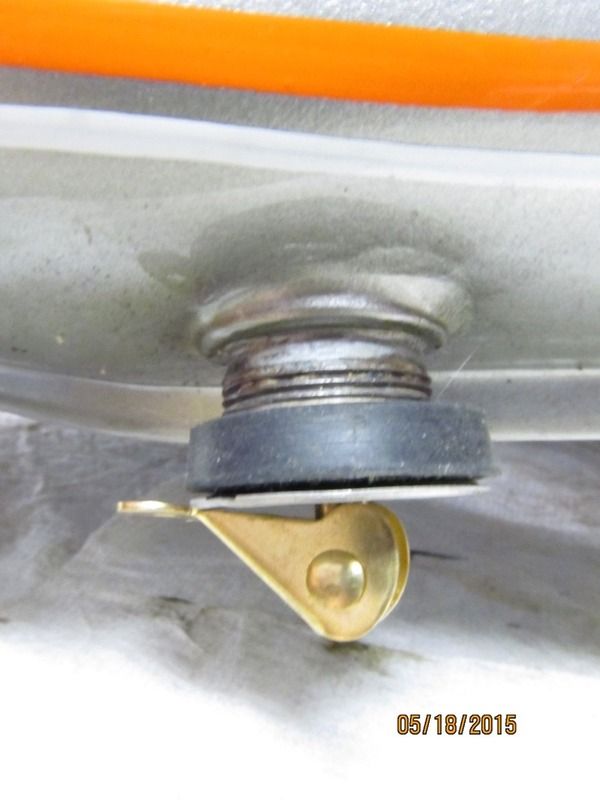
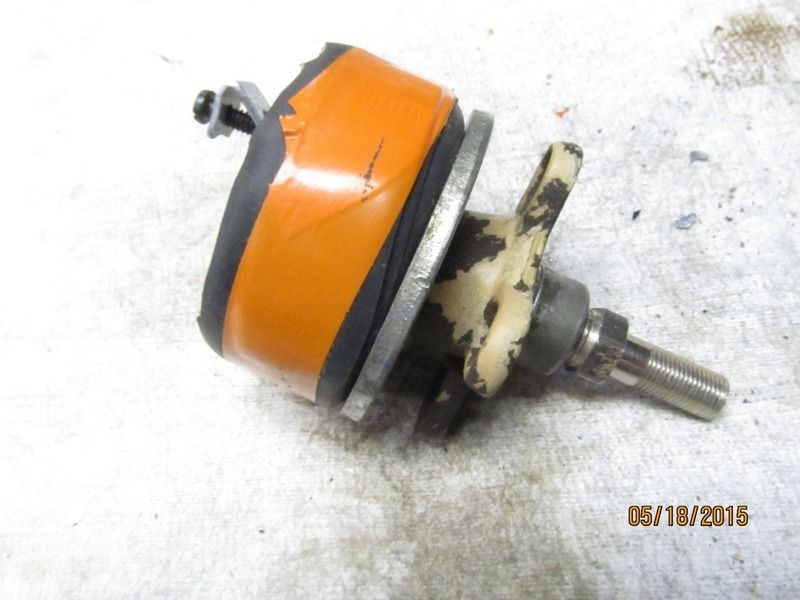
look for plugs. the big one is simply two large washers and the plumbers rubber plug and a bolt to squish the rubber flatter. i added maybe 4 wraps of vinyl tape to make up the difference or lack of to fit the tank filler hole.
all three were found in the dept. yes i soldered up an aircore using a lamp fitting ONLY because my air core has a lamp thread. you probably don't have access to that same aircore because it a telephone type product. not sold anywhere!
BUT
ANY air core stem from an old tube can be cut off and soldered. REMEMBER they are plated brass cores. there fore any type attachment to a hollow tube can easily be soldered to that lamp threaded tube. a couple nuts to ... . SO i could tighten up the rubble 'squished' . Testing ::
air can then be applied to the aircore valve and tested to 4-6 lbs.
OR .... just use the same bolts sold with the plug. about 13 bucks and don't test.
find an aircore any aircore, it doesn't matter what type, most are brass plated so they are easily solderable ONLY IF you want to add 5-6lbs pressure.
I needed to because my tank had a cracked seam. it needed to be checked after the tig weld work was done.
Thanks! I can now see whats in your photo's and why!
I think for the acid wash step I will stick with just the plug, washers and bolt/nut, then test this all with water in the tank first. Thanks again!
Advertisement


